~Seasoned Gentleman’s Supper Seasonings~
Introduction
If you enjoy the sweet taste of sea scallops, but can’t afford restaurant prices as often as you’d like, this article will teach you how to cook them yourself. You really can have a meal that as good as one prepared by a chef, but in the comfort of your home! Even an inexperienced chef can do this with excellent results! I’ll give you all the details you need to know to pull it off.
After eating the best scallops I’d ever tasted in a fine (and expensive) restaurant, I used to think that the only way to serve them that tender and juicy was to cook them using one of those special finicky French hot-water baths. That’s because whenever I’d had them at “cheaper” restaurants, they were always dry and chewy. But that’s just not true! (Besides, a “hot water bath” won’t sear them.) Now I know that anyone can cook them properly, you just need ALL the right information.
While I’m mostly wanting to cook things that aren’t expensive, every so often, we deserve a treat, right? So, this is that. We’re wanting a restaurant meal at home.
I used a noncontact infrared thermometer to measure the temperature of the pan at various times, and a stopwatch to measure the cooking times. I’ll give you all the preparation and cooking details you need, to guarantee that you get good results. Anyone can cook restaurant-quality seared sea scallops!
What’s Searing Meat?
Searing meat is one of the few times that you cook with really high heat. The idea is to seal in the juices. (I suppose we could compare it to cauterizing a wound.) With any meat, it seals in the juices and hence, flavor. In the case of scallops, it also cooks them just enough so that they are done, but still tender, tasty and enjoyable. Searing sea scallops will seal in the juices and the sweet flavor. They are melt-in-your-mouth tender, so flavorful, and you’d be hard put to find them better.
What Else for the Meal?
While scallops can go with so many different things, here I’ve paired them with fresh, healthy veggies that can be sourced from your garden or anywhere. We’ve got ‘taters, yellow squash, baby bell peppers and onion.
This is a meal for 4, or even better, 2 meals for 2 (plus some “leftovers” for breakfast). If you want a tasty meal, maybe to impress your significant other, this is what you want. Or, two couples who are good friends might get together for a nice, filling and very enjoyable meal together that won’t make everyone feel like they over-ate, but will definitely “fill their tanks!”
You’ll end up with seared sea scallops that are tender and juicy, just mouth-watering. The veggies that go with it are equally good. In fact, I wished I’d made more, because I wanted more veggies with my scrambled eggs for breakfast, even after the scallops were gone. In fact, as good as the scallops were, the veggies were a lot cheaper, and I would’ve liked them for lunch as well.
Please read this all the way through at least once before trying to cook the meal! There are a lot of useful tidbits of info scattered throughout, to ensure your success!
A 1-1/2 lb. bag of scallops had 51 scallops in it. I had calculated 10 per serving, and I was planning on feeding 2 adults for 2 meals, with a few extra to have with my scrambled eggs for breakfast. The quantities of scallops and veggies lasted for 2 evening’s suppers, and 2 morning’s breakfast. (But I wish I had more!)
Most were larger in diameter than a quarter, but not as large as a half-dollar. They were all at least ½” thick, most were around 5/8” to 3/4” inch thick. Each scallop is a cylinder-shaped single muscle from a marine bivalve.
Be sure to follow the Preparation instructions carefully before cooking the scallops.
If you follow these instructions, you’ll need to cook the scallops in several batches, and you’ll get better with each batch.
How to Get the Best Results:
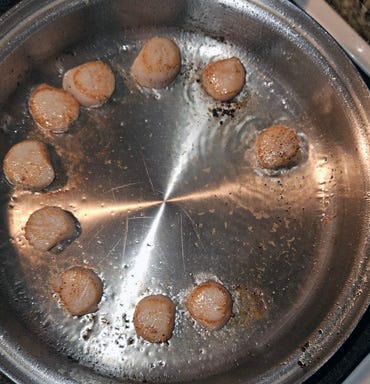
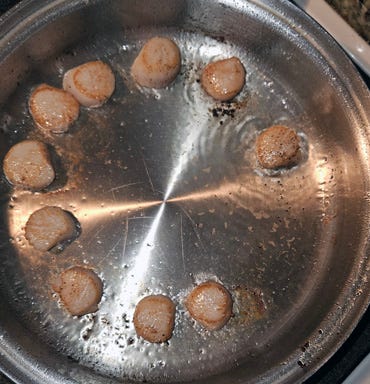
When the pan gets hot enough, put the scallops in a ring around the edge of the pan, not touching each other. The reason is to maximize the heat, I measured a minimum of 100 degress between the outside ring of the pan and the middle.
Cook the scallops on one side no longer than 1-1/2 minutes (60-90 seconds), then flip them over for another minute (45-60 seconds at most). Watch the pan temperature! I started with the (electric) burner on high, then when the pan reached 200-250, I put the oil in. Then, when the temperature reached 360, I put the scallops in and turned the heat down slightly. After I had put the all the scallops in (for the first batch), I checked the temp again, it was 560! So, I turned the heat down a little more.
When they’re adequately seared, use the tongs and flip each scallop over to cook on the other side. You’ll probably need to swirl the pan occasionally to get the oil to cover the whole bottom of the pan. (In my case, since this was my first time doing this, I actually seared them too long on the first side in the first batch. But they were still tender and juicy!)
Just before they’re done on the 2nd side, throw 2 or 3 slices of butter in the pan, quickly lift (tilt) one side of the pan up, getting it off the heat, while allowing the melted butter to pool on the other side. Use a tablespoon to scoop up the glorious melted butter and bathe each scallop with it. Do it quickly, and once you’ve bathed each scallop, then use your larger, slotted spoon to scoop up the scallops and put them on a waiting plate, covered with paper towel, to drain.
You want to end up with nicely seared scallops, with a very thin translucent strip in the center.
Mine were cooked too high for too long, so they were cooked all the way through, but with each batch I got better. Even the “overcooked” first batch were extremely tender and juicy! None were even close to chewy. I like to cut them in half when I eat them, so each bite is small, and I can savor it. I had no problems cutting them with a dull “butter knife.” I probably could have just used the side of my fork, though.
In between batches, take the pan off the heat (I turned the burner off as well), and use a wet rag or paper towel to wipe out the pan, to remove any burned bits. Mostly it’ll be burned butter. Do this over the sink while running hot water to dilute any oil and wash it down the drain, but do NOT let water hit your hot pan! Be careful to not burn yourself!
Don’t forget to wipe the outside edge of the pan, where you poured the remaining oil and butter out, because otherwise, it will likely catch fire the next time you have the pan on the hot burner!
Repeat the whole thing with the next batch of scallops. If you cook the whole bag at once, you’ll likely do them in 3 or 4 batches (depending on the size of your pan). Don’t worry, you’ll get better with each batch. Just let the pan get hot enough to sear the scallops, but not too hot so as to burn them, and don’t cook the scallops for too long on the first side, even shorter on the 2nd side. Baste with melted butter, remove from heat! Before you know it, you’ll have a whole platter of delicious, tender scallops to feast on.
How to Know the Correct Temperature Without a Non-Contact Thermometer
If you don’t have a non-contact (IR) thermometer, you can tell when the pan is hot enough to sear the scallops because the oil with be shimmering. If it starts to smoke, you’re there. Another way is to throw a drop (or several) of water into the pan, it should turn to steam instantly and violently. (Remember, water boils at 220, so if it’s hot enough to sear, it will turn into steam very rapidly and vigorously.)
Ingredients:
1.5 lb. bag of sea scallops (“Dry-Pact,” frozen)
One tablespoon vegetable oil (Canola) for each batch
Butter cut into slices, have handy to throw into frypan or skillet just as scallops are finishing cooking.
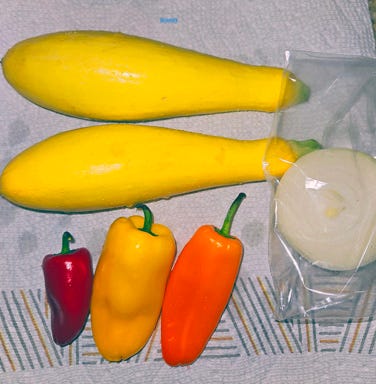
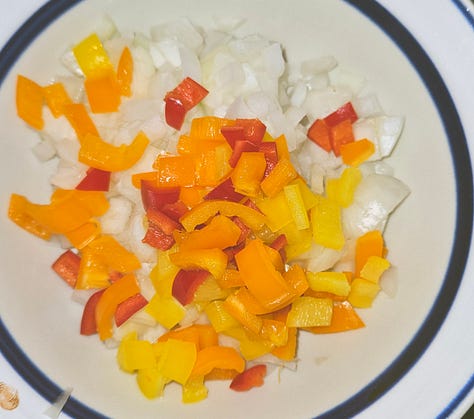
3 small baby bell peppers (see photo 1)
½ yellow (brown) onion (see photo 1)
2 yellow squash (see photo 1)
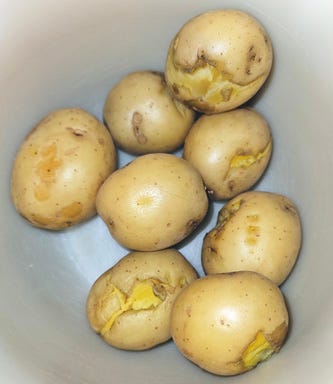
8 small golden potatoes (see photo 2). (You can use any small potatoes that you enjoy, we’ve used golden ones here.)
Beggin’ fat (You probably call it bacon fat. We save ours in the fridge, in a small glass dish with lid after we’ve cooked bacon, so we’ll have it for other things). (It’ll keep in the fridge forever.)
1 large stainless frypan or skillet, preferably not coated (any “protective coating” can be damaged by the high heat used for searing, then the coating sheds particles that get mixed with the food, ingested, and can potentially cause cancer.) You can use the same frypan for the scallops as for the veggies.
Utensils: Tongs, plastic spatula, and slotted plastic spoon. Also, one tablespoon for “basting” the scallops with melted butter.
Preparation
Thaw scallops overnight in the fridge.
Put them in a colander with a bowl underneath to catch the water. We keep our fridge pretty cold, at 34 degrees, so we turned it up to 38 just for a day. We started thawing early evening the night before we planned to cook, I checked on them the next day. Around noon, I rearranged the ones that were still frozen to the top of the pile, moving them from the bottom and “inside” of the pile, and I also turned the fridge temp up to 40. They were thawed by the time we were ready to cook supper.
You’ll need to dry them really thoroughly. Water is the enemy of searing! If there is any water in the scallops, they will end up chewy instead of seared and tender inside. Take a baking sheet, line it with aluminum foil, and put 2 layers of paper towels over the foil. Lay the scallops out in rows, and cover with another paper towel. Be sure to press it down on the scallops to get all the water from them. They’ll need to sit that way for at least 20 minutes at room temp while you’re getting other ingredients ready. Change the top towel as needed, when you can see water spots around each scallop underneath. Press it down firmly on the scallops, just like the first time.
As you’re laying the scallops out to dry, you’ll probably have to remove the small muscle with connective tissue on one side that looks like a small tail. It just tears off easily. It is edible, but it won’t be as tender and tasty as the main muscle, so feel free to get rid of them.
While the scallops are drying, prepare the other ingredients for the veggies.
Dice the onion, and the peppers. (See photo 2 for the relative quantities.)
Slice the potatoes fairly thin, and cut the slices in half. Do the same with the yellow squash. Now you’re ready to start cooking!
Cooking
(Be sure to include the tips that appear in the How to Get Best Results section)
Heat the pan on high heat. I did a lot of research to determine exactly what temperature to have the frypan. I settled on 350-400 degrees. (That’s about as close as you can get with an unregulated burner.) I measured with an infrared thermometer, so I’d know exactly what was going on.
I learned some things about our “high-end” electric stove (that came in our house with the “newly remodeled kitchen.”). That is, it has a nice “integrated cooktop,” where you can use a burner for “plate-warming” to keep something warm, and two of the burners can be “joined” and controlled together to put a griddle on them. The whole cooking surface is flat to make cleaning easier. But the temperature control is not easy to regulate! After the burner got up to temperature (360), I turned it down slightly. But in less than a minute, it was up to 560! I had to keep turn it down more, but I was always concerned that it wouldn’t be hot enough to sear my little scallops, and they would end up over-cooked but not seared. It would be nice if I could set them at a specific temperature and it would be regulated. But that is simply not the case.
At any rate, everything came out well.
Cook the scallops as described in the previous section. Don’t forget to season them with salt and pepper before you put them in the pan. Once again, using the tongs, lay each scallop down around the outside edge of the pan, forming a ring, with none of them touching each other (See photo 4). Check them regularly, using your tongs. You won’t cook them for more than 1-1/2 minutes on the first side before you have to turn them over. (Cook time will likely be closer to just over a minute on the first side, less than a minute on the second side.) Once they’re nicely seared on the first side, turn each one over using the tongs, then get the butter slices ready. Even before you think they’re finished cooking (less than a minute), toss 2 or 3 slices of butter in the pan, then lift one side of the pan off the heat, allowing the butter to pool in the other side, and grab your tablespoon to start bathing each individual scallop with melted butter. By the time you’re done with each one, it’s time to remove the pan completely from the heat. Using your slotted spoon, scoop the scallops up quickly and dump them on the plate you already have ready with paper towel, to drain. You’re done with that batch!
(Remember, whenever you’re cooking anything with any oil of fat, it will continue to cook after you’re removed it from the heat, and even from the pan. That’s because the oil or fat is still hot. So, you have to compensate, especially with small and/or thin items. Just like with bacon slices, it holds true for scallops.)
When you’re done cooking the scallops, wipe the pan out once more. Now it’s time to cook the veggies, and here you won’t need such a high heat. Use another tablespoon of canola oil on medium high (or even medium) heat. When it gets up to temp, toss in your diced onion and bell peppers.
Keep stirring them, moving them around on the heat, like stir-frying in a wok. As soon as they become translucent, toss in the squash.
(In this particular case, I had boiled the potatoes the day before, but I don’t think it was necessary. Since I had boiled them, I didn’t want to cook them as long now, so I waited until the squash was mostly cooked before I tossed the ‘taters in. Next time, I think I’ll probably put the ‘taters in sooner and cook them about as long as the squash.)
While the squash was cooking, I added 3 heaping tablespoons of beggin’ fat. (That’s what I call it, due to the dog treat commercial. Most people just call it bacon fat.) This helps the squash to cook, and it adds some fantastic flavor!
Once the veggies are all done, remove from heat, and serve.
(We put all the scallops in one glass storage container, and the veggies in a separate one. I didn’t want to store the scallops in the same container because there is some juice in the veggies and I didn’t want to scallops to be soggy for the next meal. With the “leftovers,” we microwaved everything just enough to warm it up for the 2nd meal, and also for breakfast, taking care not to cook the scallops any further.)
As I mentioned earlier, we got 2 adult sized meals for 2 evenings, each serving had 10 scallops and a generous serving of veggies. We also had enough to have a few scallops, and a small helping of veggies with scrambled eggs for breakfast for 2, twice.
I could eat this way every day! While scallops can be expensive, it’s a nice treat to have every now and then, and cooking them yourself is much, much less expensive than eating them at a restaurant. And, with the details explained herein, you’re guaranteed success!


